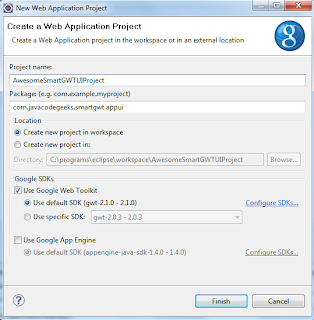
Justin, Pat and I have started working on a side project that requires a user interface for administration and management. After working for a while with SmartGWT and GWT in general, we decided to create the interface using SmartGWT. We really liked the visual components (check out the SmartGWT showcase) and the fact that it facilitates rapid development. In this tutorial I am going to show you how we created the prototype for our UI in just a few hours. The interface is heavily influenced by the Drools Guvnor application. We use Drools in a lot of our projects and we have Guvnor for the business rules creation. We simply love the user interface, it is both visually beautiful and functionally practical. Check out some Guvnor screenshots. Let’s get started. I assume you have already installed the GWT SDK and the Google plugin for Eclipse. SmartGWT is compatible with GWT 1.5.3 , GWT 1.6.4, GWT 1.7.x and GWT 2.0.x. Currently, I am using the GWT 2.1.0 SDK and the SmartGWT 2.2 version. In essence, this is a somewhat more advanced tutorial regarding SmartGWT, thus you might have to check my introductory “Getting Started with SmartGWT for awesome GWT interfaces” tutorial. Additionally, another helpful resource is the “Layout the User Interface” tutorial which we used to kick-start the development of our own interface. First we create a new “Web Application Project” in Eclipse. I chose “AwesomeSmartGWTUIProject” for the project name and “com.javacodegeeks.smartgwt.appui” for the package name. Next, add the “smartgwt.jar” file from the extracted ZIP to the project’s classpath. Note that this file should also be added to the “war/WEB-INF/lib” directory. Then edit the module xml file (named “AwesomeSmartGWTUIProject.gwt.xml”) and add the following line after the standard “inherits” declarations:
In addition, comment out the existing section that declares the usage of the GWT theme:
This is what the module XML file should look like:
Next step is to erase some of the auto-generated code that exists in the “AwesomeSmartGWTUIProject.html” file and more specifically the H1 and Table tags. This is what you should be left with:
Web Application Starter Project
Similarly, remove all the code existing in your EntryPoint class, named “AwesomeSmartGWTUIProject”, and just leave an empty onModuleLoad method like the following:
package com.javacodegeeks.smartgwt.appui.client; import com.google.gwt.core.client.EntryPoint; public class AwesomeSmartGWTUIProject implements EntryPoint < public void onModuleLoad() < >>
HLayout: This is a layout related class that applies a sizing policy along the horizontal axis, i.e. all their internal components will be placed in a horizontal manner.
VLayout: This is a layout related class that applies a sizing policy along the vertical axis, i.e. all their internal components will be placed in a vertical manner.
Those classes both extend from the parent Layout, thus they inherit the addMember method that allows them to add other Canvas objects or Widgets.
Using various layout objects we will break down the whole screen area to specific sub-areas (north, south, east, west and main). Let’s see how our first version of the entry point class looks like:
package com.javacodegeeks.smartgwt.appui.client; import com.google.gwt.core.client.EntryPoint; import com.google.gwt.user.client.Window; import com.google.gwt.user.client.ui.RootLayoutPanel; import com.javacodegeeks.smartgwt.appui.client.ui.ApplicationMenu; import com.javacodegeeks.smartgwt.appui.client.ui.HeaderArea; import com.javacodegeeks.smartgwt.appui.client.ui.MainArea; import com.javacodegeeks.smartgwt.appui.client.ui.NavigationArea; import com.smartgwt.client.widgets.layout.HLayout; import com.smartgwt.client.widgets.layout.VLayout; public class AwesomeSmartGWTUIProject implements EntryPoint < private static final int HEADER_HEIGHT = 85; private VLayout mainLayout; private HLayout northLayout; private HLayout southLayout; private VLayout eastLayout; private HLayout westLayout; public void onModuleLoad() < Window.enableScrolling(false); Window.setMargin("0px"); // main layout occupies the whole area mainLayout = new VLayout(); mainLayout.setWidth100(); mainLayout.setHeight100(); northLayout = new HLayout(); northLayout.setHeight(HEADER_HEIGHT); VLayout vLayout = new VLayout(); vLayout.addMember(new HeaderArea()); vLayout.addMember(new ApplicationMenu()); northLayout.addMember(vLayout); westLayout = new NavigationArea(); westLayout.setWidth("15%"); eastLayout = new MainArea(); eastLayout.setWidth("85%"); southLayout = new HLayout(); southLayout.setMembers(westLayout, eastLayout); mainLayout.addMember(northLayout); mainLayout.addMember(southLayout); // add the main layout container to GWT's root panel RootLayoutPanel.get().add(mainLayout); >>
Don’t worry about the compilation errors, we will create the necessary classes later. As you can see, we have broken the whole screen area to smaller blocks and using the SmartGWT API we have wired all the components together. Note the use of the setWidth100 and setHeight100 methods, which conveniently allow the specific component to occupy the whole available area. Finally, the RootLayoutPanel is the GWT class that gives us access to the root panel of the screen. Let’s now create the various components.
package com.javacodegeeks.smartgwt.appui.client.ui; import com.smartgwt.client.types.Alignment; import com.smartgwt.client.types.Overflow; import com.smartgwt.client.widgets.Label; import com.smartgwt.client.widgets.layout.HLayout; public class ApplicationMenu extends HLayout < private static final int APPLICATION_MENU_HEIGHT = 27; private Label label; public ApplicationMenu() < super(); this.setHeight(APPLICATION_MENU_HEIGHT); label = new Label(); label.setContents("Application Menu"); label.setAlign(Alignment.CENTER); label.setOverflow(Overflow.HIDDEN); this.addMember(label); >>
Nothing special here, we have just added a Label to the layout and set the Alignment to center.
package com.javacodegeeks.smartgwt.appui.client.ui; import com.smartgwt.client.types.Alignment; import com.smartgwt.client.types.Overflow; import com.smartgwt.client.widgets.Img; import com.smartgwt.client.widgets.Label; import com.smartgwt.client.widgets.layout.HLayout; public class HeaderArea extends HLayout < private static final int HEADER_AREA_HEIGHT = 60; public HeaderArea() < super(); this.setHeight(HEADER_AREA_HEIGHT); Img logo = new Img("jcg_logo.png", 282, 60); Label name = new Label(); name.setOverflow(Overflow.HIDDEN); name.setContents("Java 2 Java Developers Resource Center"); HLayout westLayout = new HLayout(); westLayout.setHeight(HEADER_AREA_HEIGHT); westLayout.setWidth("70%"); westLayout.addMember(logo); westLayout.addMember(name); Label signedInUser = new Label(); signedInUser.setContents("Fabrizio Chami"); HLayout eastLayout = new HLayout(); eastLayout.setAlign(Alignment.RIGHT); eastLayout.setHeight(HEADER_AREA_HEIGHT); eastLayout.setWidth("30%"); eastLayout.addMember(signedInUser); this.addMember(westLayout); this.addMember(eastLayout); > >
Similarly, quite simple. We have added an image using the Img class and providing the file’s name. Note that the image URL falls automatically under an “images” folder, so basically the “jcg_logo.png” file must reside in the “war/images” folder.
package com.javacodegeeks.smartgwt.appui.client; import com.smartgwt.client.types.Overflow; import com.smartgwt.client.types.VisibilityMode; import com.smartgwt.client.widgets.Label; import com.smartgwt.client.widgets.layout.HLayout; import com.smartgwt.client.widgets.layout.SectionStack; import com.smartgwt.client.widgets.layout.SectionStackSection; public class NavigationArea extends HLayout < public NavigationArea() < super(); this.setMembersMargin(20); this.setOverflow(Overflow.HIDDEN); this.setShowResizeBar(true); final SectionStack sectionStack = new SectionStack(); sectionStack.setVisibilityMode(VisibilityMode.MULTIPLE); sectionStack.setShowExpandControls(true); sectionStack.setAnimateSections(true); sectionStack.setVisibilityMode(VisibilityMode.MUTEX); sectionStack.setOverflow(Overflow.HIDDEN); SectionStackSection section1 = new SectionStackSection("Section 1"); section1.setExpanded(true); Label label1 = new Label(); label1.setContents("Label1"); section1.addItem(label1); SectionStackSection section2 = new SectionStackSection("Section 2"); section2.setExpanded(false); Label label2 = new Label(); label2.setContents("Label2"); label2.setOverflow(Overflow.AUTO); label2.setPadding(10); section2.addItem(label2); SectionStackSection section3 = new SectionStackSection("Section 3"); section3.setExpanded(false); Label label3 = new Label(); label3.setContents("Label3"); label3.setOverflow(Overflow.AUTO); label3.setPadding(10); section3.addItem(label3); sectionStack.addSection(section1); sectionStack.addSection(section2); sectionStack.addSection(section3); this.addMember(sectionStack); >>
For the navigation area we wanted an accordion like component. This is implemented in SmartGWT via the SectionStack class to which we add SectionStackSection instances. To those items we can add arbitrary widgets, but for now we just add some Labels for simplicity. Notice the use of the setShowResizeBar method, which allows us to show a re-size bar after this member in the layout, to allow it to be resized.
package com.javacodegeeks.smartgwt.appui.client.ui; import com.smartgwt.client.types.Alignment; import com.smartgwt.client.types.Overflow; import com.smartgwt.client.widgets.Label; import com.smartgwt.client.widgets.layout.VLayout; public class MainArea extends VLayout < private Label label; public MainArea() < super(); label = new Label(); label.setContents("Main Area"); label.setAlign(Alignment.CENTER); label.setOverflow(Overflow.HIDDEN); this.addMember(label); >>
The main area will host the bulk of our interface’s widgets, but for now includes only a label.
OK, let’s see what we have done so far. Launch the Eclipse configuration (as a Web Application Project) and point your browser to the provided URL:
This is an image of what you should be seeing:
Not bad for a few minutes of code. Without having to mess with CSS, HTML and JavaScript we have we have created the skeleton of our UI, which consists of strictly defined sub-areas. What is left is to beef it up by populating the areas with various fancy widgets.
In the next part of this tutorial, I am going to introduce you to some of the most advanced components (like trees and tabs). For now, you can find here the Eclipse project created so far. Note that I have removed some of the SmartGWT specific stuff (images etc.) cause they bloated the archive. Those should be automatically created with a new project. The “gwt-servlet.jar” has also been removed from the “war\WEB-INF\lib” directory.
Happy UI coding!
UPDATE: I have also published the second part of this tutorial.
Related Articles :
Getting Started with SmartGWT for awesome GWT interfaces
Add JSON capabilities into your GWT application
Building your own GWT Spring Maven Archetype
Adding CAPTCHA to your GWT application
GWT Spring and Hibernate enter the world of Data Grids
 Next, add the “smartgwt.jar” file from the extracted ZIP to the project’s classpath. Note that this file should also be added to the “war/WEB-INF/lib” directory.
 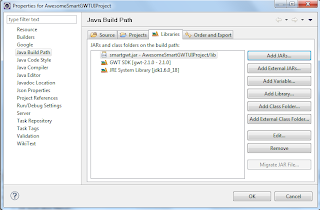 Then edit the module xml file (named “AwesomeSmartGWTUIProject.gwt.xml”) and add the following line after the standard “inherits” declarations: